What to do when your PR fails

· 5 min read
Bekah Hawrot Weigel
Developer Experience Lead

Yesterday, I decided to make some "quick" changes to the OpenSauced docs site. Now, I know that "quick changes" is essentially a bad word in tech. Anytime you say it, it will indeed not be quick. I wrote up a quick issue that described reorganizing a couple of things and adding a quick intro page. I made the changes, wrote the page, pushed my changes, and made the Pull Request (PR), only to see that I failed. Ugh. It was quick, but it wasn't right. Not really having the time to dig into it, I left my PR open and determined to get back to it the next day. Understanding why a project is failing may look different depending on how it is set up. For us, we're going to look at implementation errors, compliance issues, check the deploy log.

Strategies for Successful Contributor Onboarding

· 10 min read
Bekah Hawrot Weigel
Developer Experience Lead

Every week at 10:30a ET, I do X/Twitter spaces about open source. I’ve been fortunate enough to learn from some amazing folks in the space, and two conversations really had me thinking about this topic. I chatted with Rachel Nabors of Clerk and Ben Holmes of Astro about open source projects and the contributor’s journey. They both shared their philosophies on how to cultivate a positive contributor journey. As a former educator, it made a lot of sense: If we want to see return contributors, we need to create a space that encourages them to return. Part of this means cultivating a contributor journey that allows your contributors to grow, receive recognition for their contributions, and provides a positive experience. Creating an impactful contributor journey requires deliberate thought and understanding, listening, and a willingness to grow with your contributors.

So You're Interested in Being an Open Source Maintainer

· 10 min read
Bekah Hawrot Weigel
Developer Experience Lead

A lot of contributors ask how to become a maintainer. I became a maintainer by creating an open source project and inviting others to contribute. @Ayu and @Chrissy became maintainers of some OpenSauced repositories by contributing to the projects, demonstrating leadership by helping others, and through their support for maintainers. There’s no one direct path to maintainership, but one piece of advice I give contributors who are interested in that path is to understand the role before taking it on. Being a maintainer can be lonely, and there’s a lot of work that goes into it that you should be aware of before jumping into the role. With that said, if you understand the role and have the capacity to take it on, you might find—like I did—that it can be one of the most gratifying experiences you could have in tech.

Boost productivity with the GitHub CLI

· 10 min read
Nick Taylor
AI Engineer

The GitHub CLI is an indispensable tool as a project maintainer or contributor on GitHub. It can boost your productivity when getting things done.

Someone's head exploding like the exploding head emoji

The day my brain exploded was when I discovered (spoilers) that you could create a pull request using the GitHub CLI.

Let's get started!

Install the GitHub CLI

Head on over to the installation docs to get the GitHub CLI set up. There are installers for Linux, Windows, and macOS.

Log In to GitHub via the GitHub CLI

You're up and running but if you try to run any commands, you're going to be prompted to log in, so let's do that first.

Trying to execute a GitHub CLI command when not logged in results in the following message, To get started with GitHub CLI, please run: gh auth login
Alternatively, populate the GH_TOKEN environment variable with a GitHub API authentication token.

To log in to GitHub via the GitHub CLI, run gh auth login.

GitHub CLI gh auth login command running

You'll be given two options for logging in. GitHub.com or GitHub Enterprise Server. In most cases, unless your company uses GitHub Enterprise Server, you'll select the default, GitHub.com.

Next, you'll be asked which protocol to log in with. The default is HTTPS, but I recommend SSH. To learn more about configuring GitHub with SSH, see Connecting to GitHub with SSH.

Login via SSH

The GitHub CLI prompting with the following, What is your preferred protocol for Git operations? Use arrows to move, type to filter HTTPS or SSH

Next, it will ask you to publish your public key to GitHub. This is safe to do and you can proceed.

GitHub CLI prompting to upload your public SSH key

It will prompt for a title for the key. Using the default value of "GitHub CLI" is fine.

The GitHub CLI prompting for a title for the SSH public key

Login via HTTPS

If you choose HTTPS, you'll be asked to authenticate Git with your GitHub credentials.

The GitHub CLI prompting to log in with your GitHub credentials

Press ENTER to continue.

Finishing Login Process

Next, you'll be prompted to log in via the browser or a token. To be honest, I've never used a token at this step. I always log in via the browser. If you have a token, go for it.
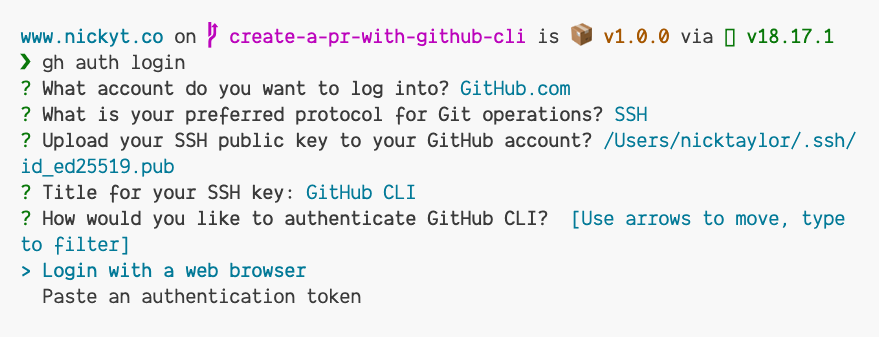
The GitHub CLI prompting to log in to GitHub via a browser or a token

You'll be given a code in the CLI that you need to copy (changed to some code in my screenshot) and then press ENTER to log in via the browser.
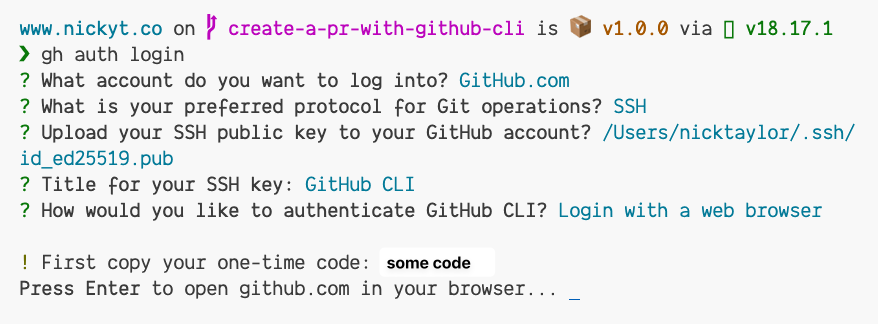
The GitHub CLI outputting a code you need to copy to finish the login process

Paste or type in the code and press the Continue button.
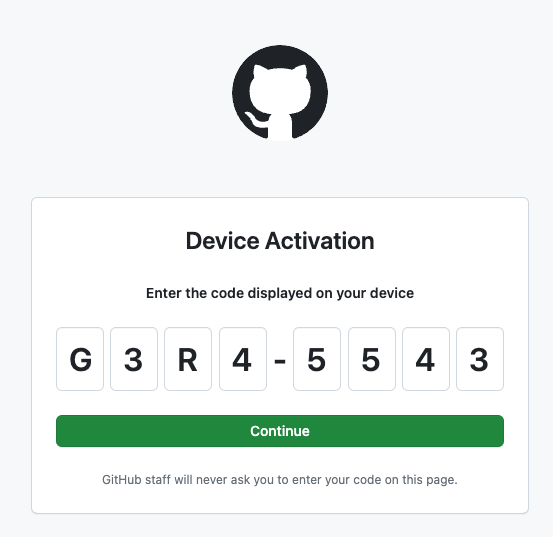
GitHub.com device activation screen

Next, you'll be asked to Authorize GitHub. Click the Authorize GitHub button.
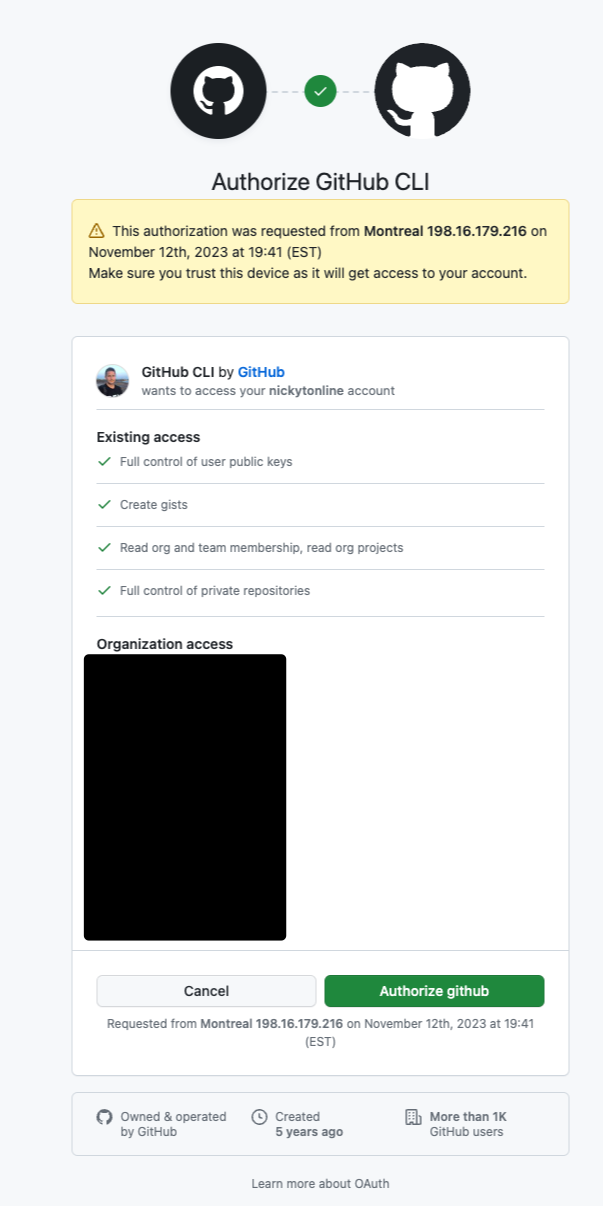
The authorize GitHub CLI screen on github.com

At this point, depending on how you have the security of your account set up, you may be asked to log in via the GitHub mobile app.
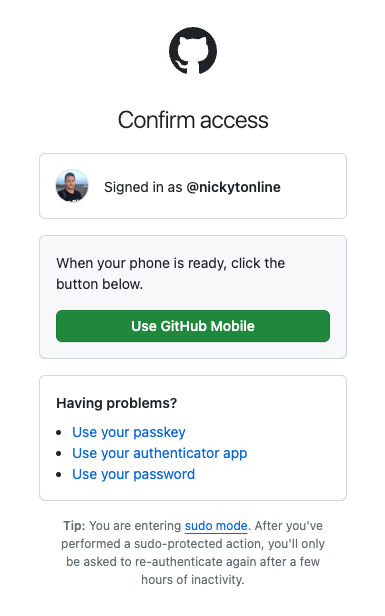
Multifactor confirm access screen using GitHub mobile

Log in via the GitHub mobile app or other multifactor authentication methods you have set up.

At this point, you should be all set up.
GitHub.com confirmation screen that the device was connected successfully

And if you go back to the command line, you should see something similar to this.

GitHub CLI confirming that you are logged in

Useful Commands

Let's walk through a couple of commands I use every day, and then we'll check out some other useful ones that I use less frequently.

Reviewing a Pull Request

As a maintainer of a project, you will definitely be reviewing PRs (for external contributors or team members). Before we had the GitHub CLI, I always had to Google how to get someone's PR on my local machine with Git. I forgot all the time, so, at one point, I made a Git alias for it. The command looks like this, git fetch origin pull/pr_number/head:name_of_branch. So if I was going to review pull request 1234, the command would look something like this, git fetch origin pull/1234/head:pr-1234. You can call the branch whatever you want. I used to name it pr- with the number of the PR.

None of that is necessary these days. With the GitHub CLI, all you need to do is cd into the project directory in your terminal and then run gh co pr-number, e.g. gh co 2062

Here it is in action for a recent pull request I reviewed for the OpenSauced app repository.
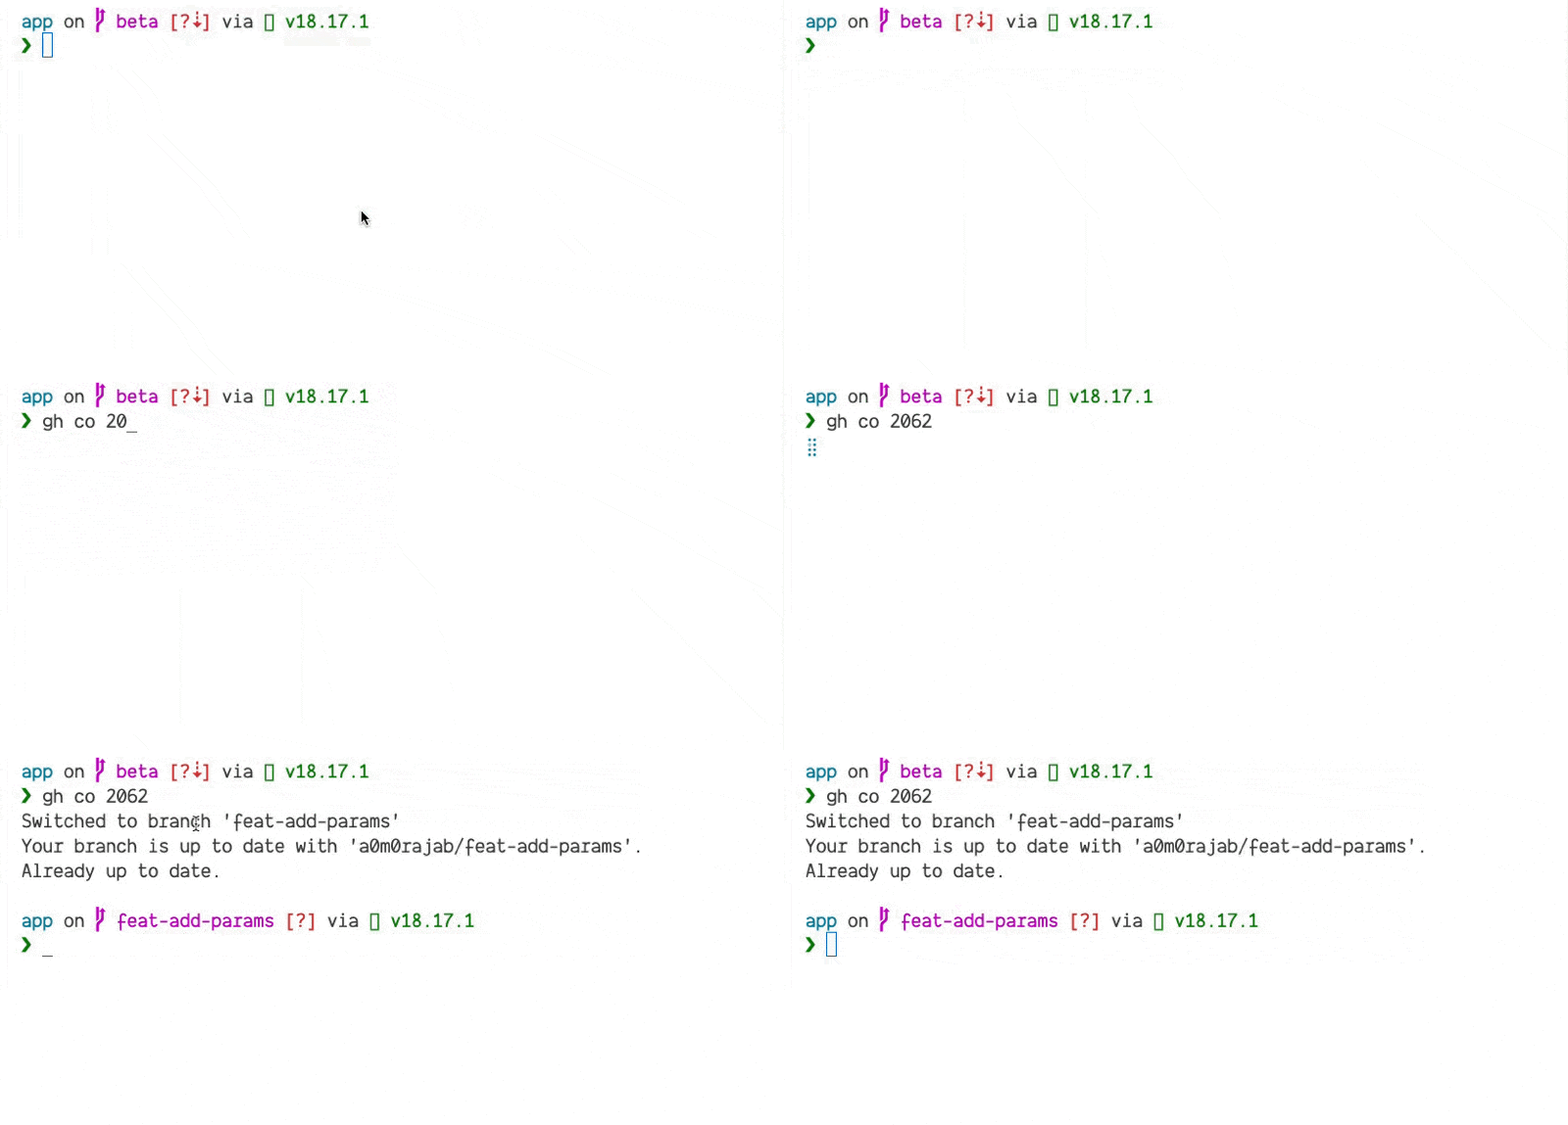
Running the GitHub CLI checkout command, gh co 2062, to check out pull request 2062 from a repository

Creating a Pull Request

Before the GitHub CLI, I used to push my branch to GitHub, and then I would go to the repository's page on GitHub.com and create a pull request from there.

A repository's main page on github.com with a call to action to create a pull request from a branch pushed to github.com

Although that works, when I discovered that the GitHub CLI could do this, I was blown away. All you need to do is run gh pr create from the command line, assuming you're currently on the branch of the repo you want to associate with the pull request. You can provide additional arguments, e.g. gh pr create --draft or the shorter version gh pr create -d, but typically, when I'm creating a PR, I go through the steps in the CLI and continue the final step in the browser. It's a preference, so do what works best for you.

Here's me creating a new test PR.
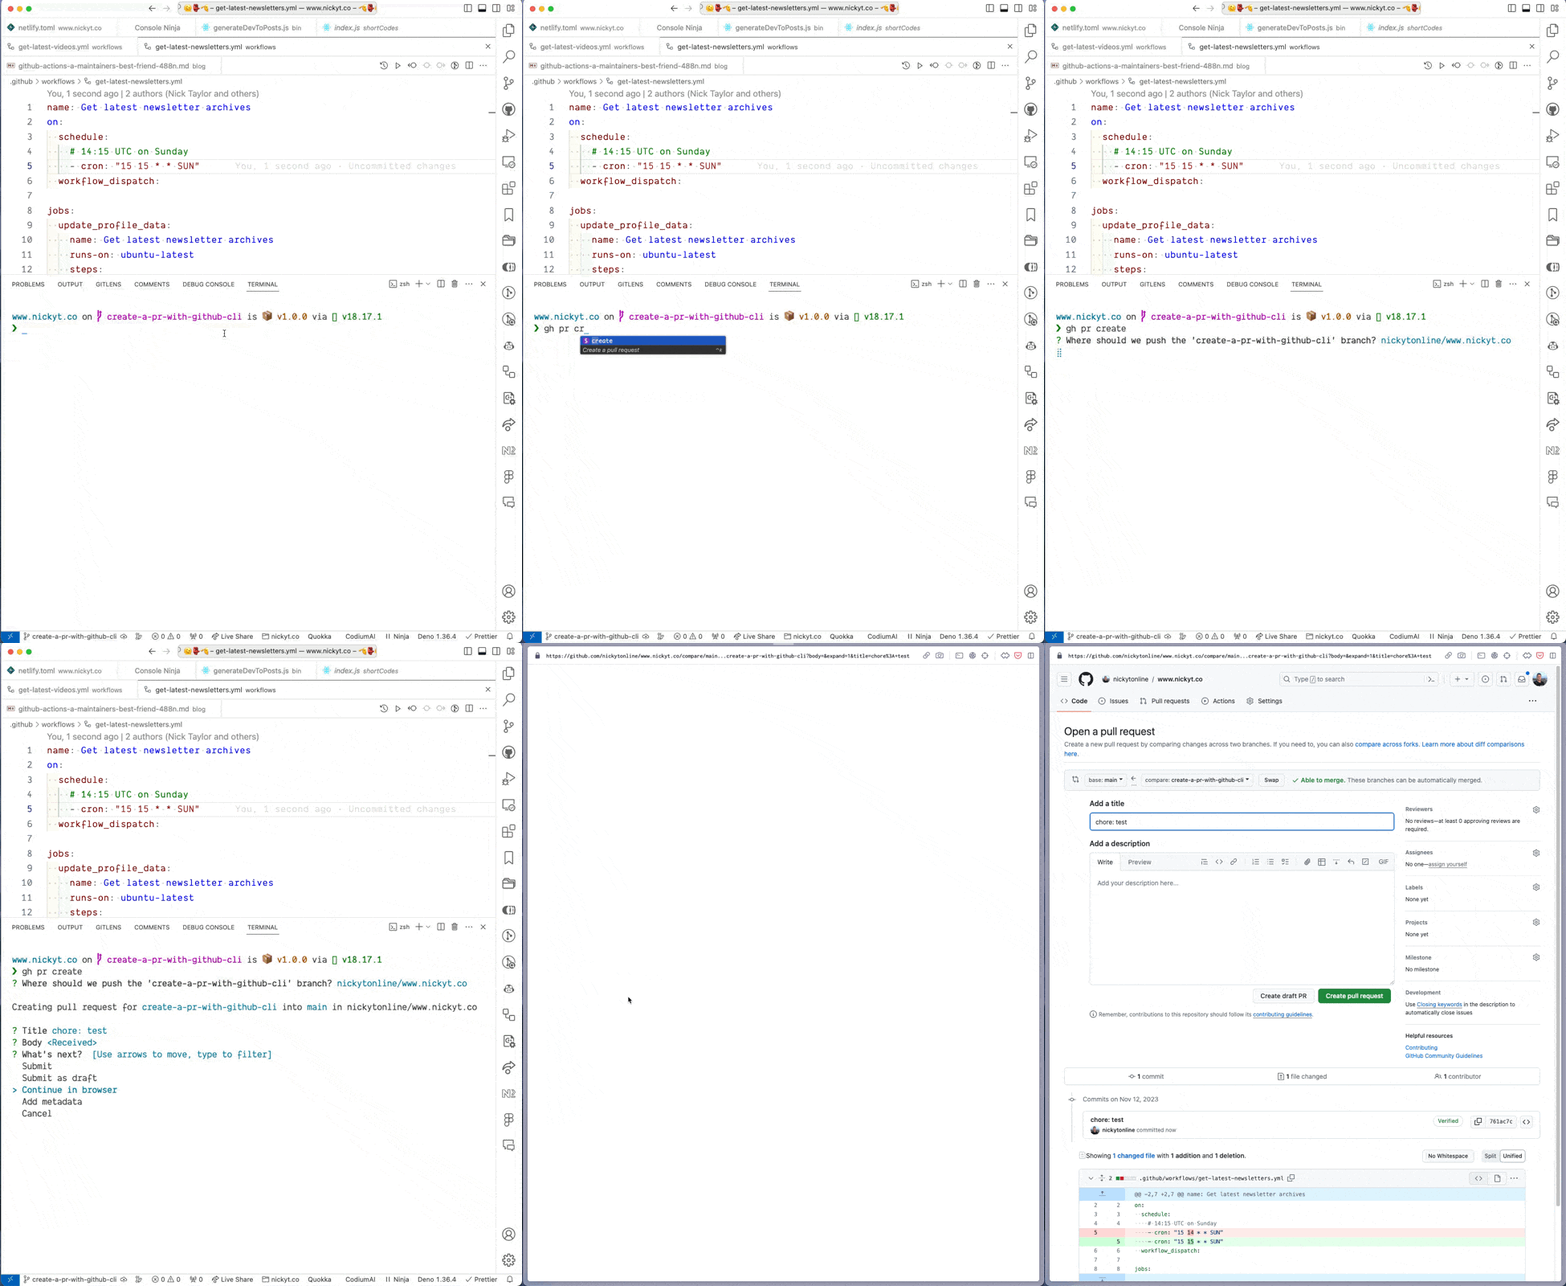
Running the GitHub CLI create pull request command, gh pr create, to create a new pull request for a repository

Creating or Pushing a New Repository to GitHub

In the past, I always used to create a new repository from GitHub.com.
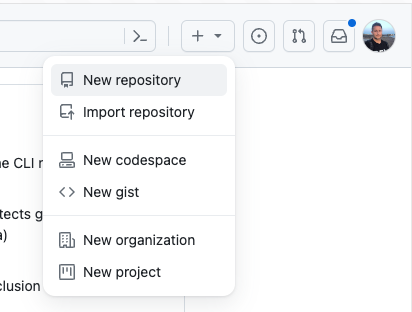
User menu on GitHub.com open with the menu item New Repository highlighted

I'm sure there is a way to create a repository on GitHub from the command line, but I never bothered to learn it, and now I don't really need to thanks to the GitHub CLI.

Create a Repository from Scratch

To create a repository from scratch, run gh repo create from the command line.

The GitHub CLI prompting user what to do with Create a new repository from scratch selected

Select Create a new repository on GitHub from scratch and press the ENTER key.

Next, you'll be prompted to name the repository, e.g. test.

The GitHub CLI prompting for a name for the repository

Next, choose the repository owner. If you're a part of one or more GitHub organizations, they will appear in the list. For our example, I will go with my own account, nickytonline as the repository owner.
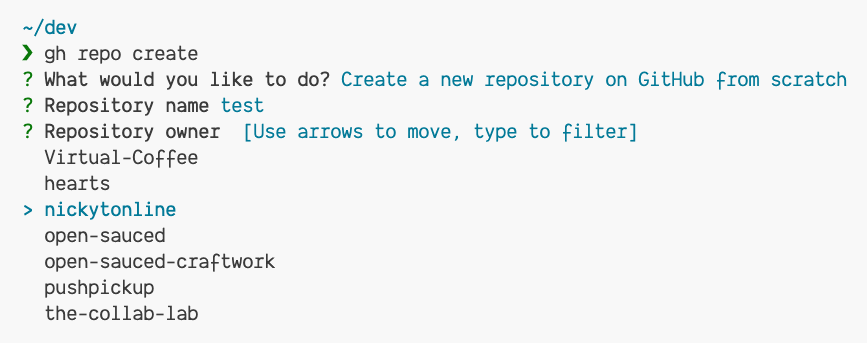
The GitHub CLI prompting for a repository owner

Add a description for the repository, e.g. test or leave it blank. It's not required.

The GitHub CLI prompting for a description

Next, set the visibility of the repository. It can be public (default), private, or internal.

The GitHub CLI prompting for the visibility of the repository

Since this is a test repository, I'm going to set it to private.
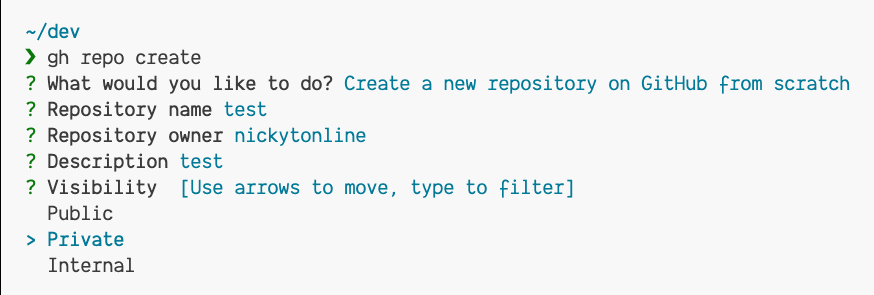
The GitHub CLI running with privacy selected for the visibility

Next, you'll be asked to create a README file. Type y and press the ENTER key.

The GitHub CLI prompting to create a README

You'll be prompted to add a gitignore file. Type y and press the ENTER key.

The GitHub CLI prompting for to create a gitignore file

Next, choose the language that will best reflect the contents of the gitignore file. I do a lot of JavaScript, Node.js and TypeScript, so I'm going to choose Node.

Node selected as the language for the gitignore template

You'll be asked to add a license. Type y and press the ENTER key.
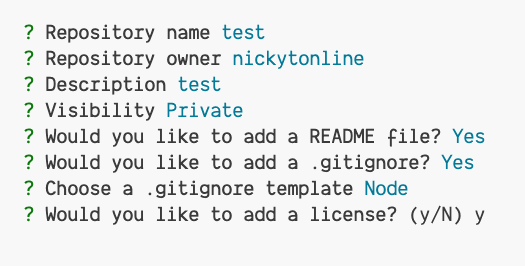
The GitHub CLI prompting to create a license

Choose the license that makes the most sense for the project you're creating. For the purposes of this blog post, I'll choose the MIT license.
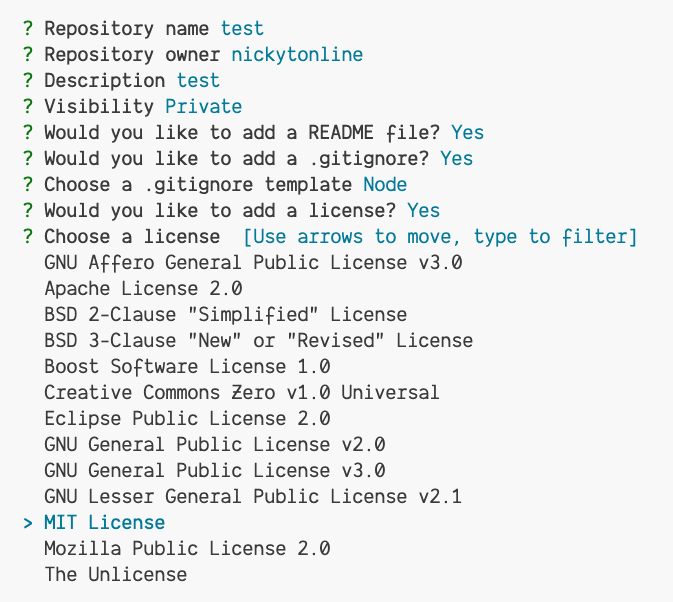
MIT License selected in the GitHub CLI

A quick check will ask if you want to create the repository on GitHub. Type y and press the ENTER key to proceed.
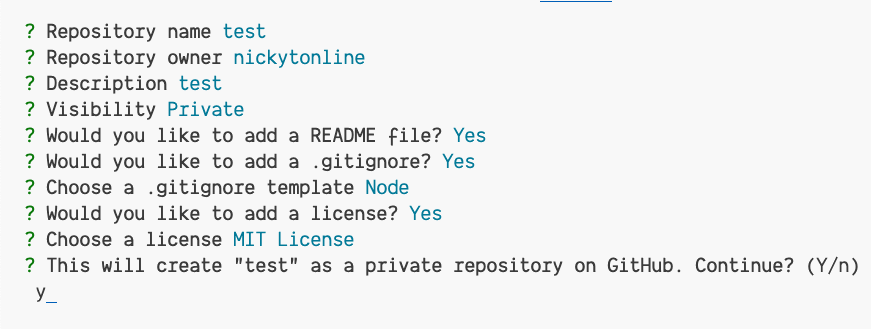
The GitHub CLI summarizing all the selections made, prompting the user to create the repository on GitHub

Next, you'll be asked if you want to clone the repository locally.
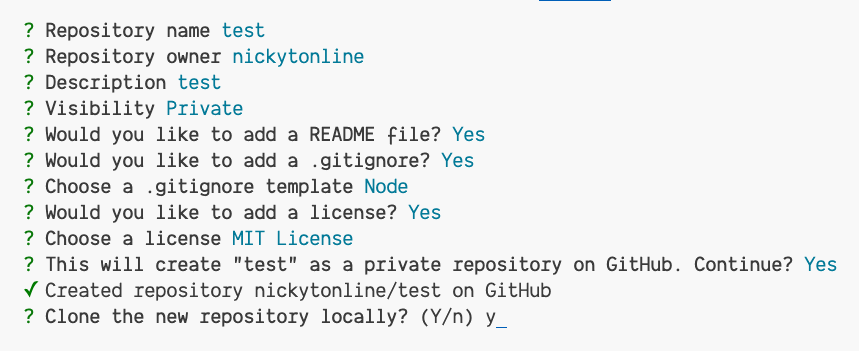
The GitHub CLI asking the user if they want to clone the repository

Type y and press the ENTER key to proceed.

The new repository is on GitHub.com now and has been cloned on your machine.

Push an Existing Local Repository to GitHub

To push an existing local repository to GitHub, run gh repo create from the command line.

The GitHub CLI, with the Push an existing local repository to GitHub option selected

You'll be prompted for the path to the local repository. It defaults to ., the current directory. If, for some reason, you ran the command outside your local git repository folder, specify the folder to your repository.

The GitHub CLI prompting to enter the path to a local repository

Next, you'll be asked to name the repository. By default, it will use the name of the folder the local repository resides in, e.g. test. Change it if it makes sense to.

The GitHub CLI, prompting a user to enter a repository name

Next up, you're prompted to select a repository owner. By default, it's your user, e.g. nickytonlin, but you can select any organizations you're a part of as well.
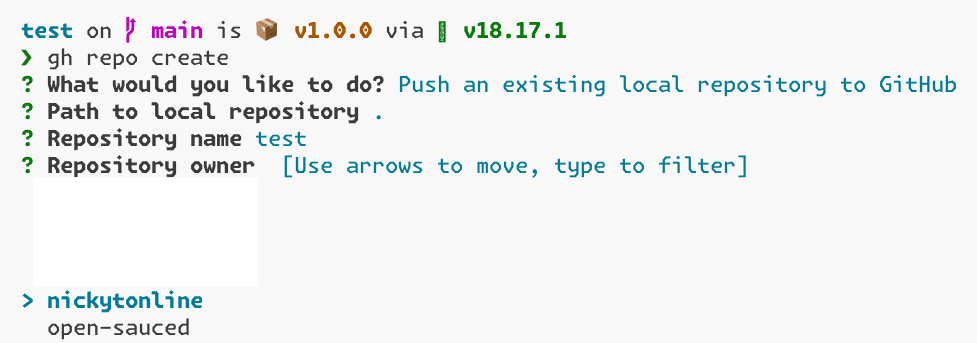
The GitHub CLI prompting for a repository owner

Next, you'll be asked to add a description. You can add one or leave it blank. It's up to you.

The GitHub CLI prompting for a description for the repository

Next, you'll be asked to set the visibility of the repository. It can be public (default), private, or internal.
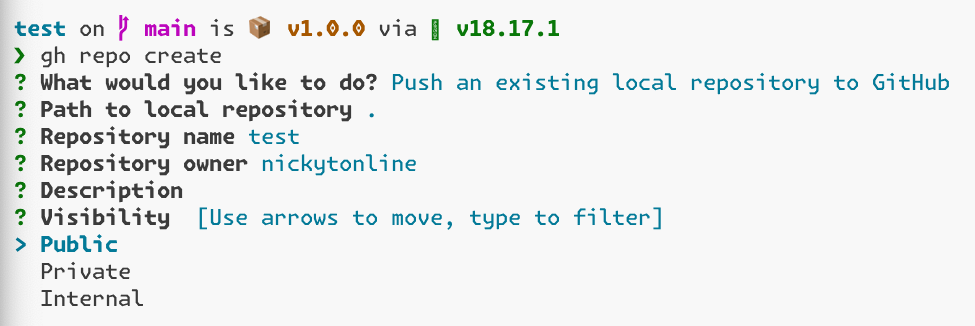
The GitHub CLI prompting to select the visibility of the repository

Next, you'll be asked if you want to set a remote. Press enter to say yes (the default)

The GitHub CLI prompting to add a remote for the repository

You'll be asked what the new remote should be called. Press the ENTER to accept the default name of origin. The GitHub CLI notifies you that the remote has been added, e.g. git@github.com:nickytonline/test.git
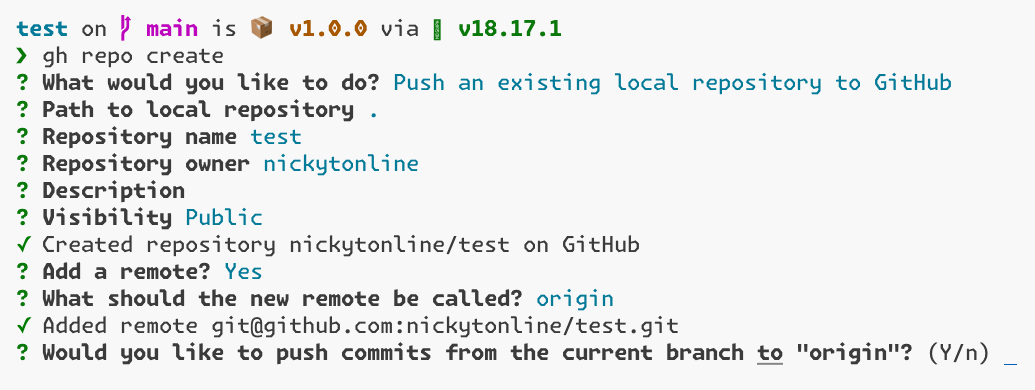
The GitHub CLI prompting to name the remote

And finally, you'll be asked if you want to push the commits from the current branch to the origin remote. Press the ENTER key to push the commits, and you're done!
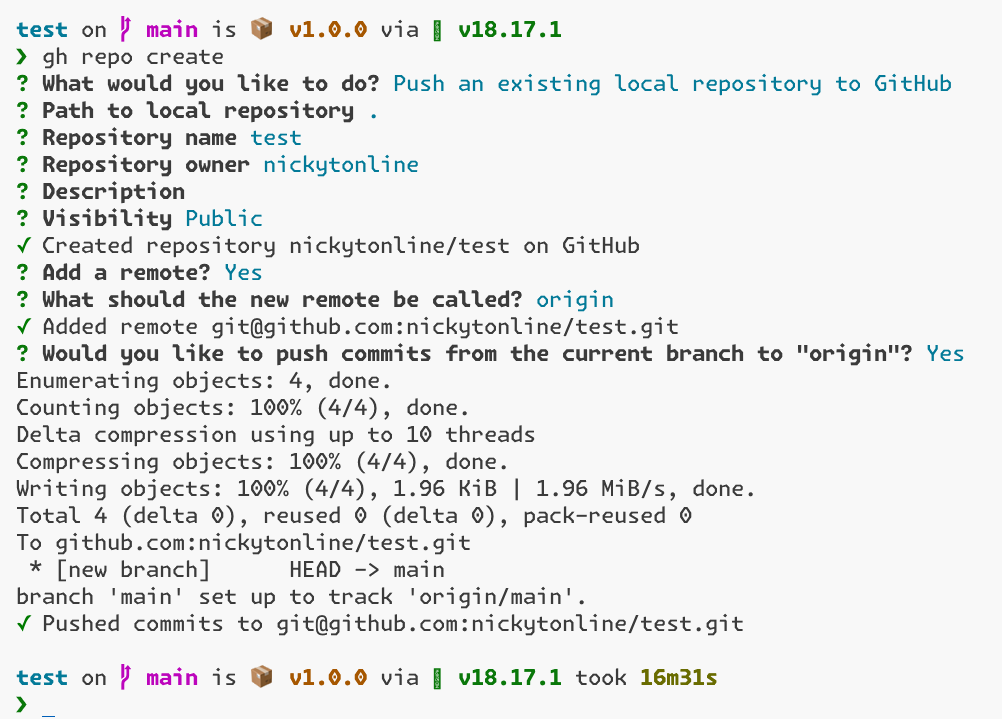
The GitHub CLI pushing the current branch to the origin remote on GitHub

Conclusion

For myself, the GitHub CLI has become a game changer in my day-to-day workflow. I literally use it every day, well, work days. 😎

From creating a new repository, to pulling down a pull request (PR) to creating a PR and more, the GitHub CLI has become indispensable to me.

There is a whole other set of commands available in the GitHub CLI that I encourage you to check out and that, to be honest, even I should explore further.

I realize not everyone is comfortable with the command line, but I think that if you give the GitHub CLI a chance, you may grow to love it. As always, though, use the tools that make you the most productive.

Stay saucy peeps!

If you would like to know more about my work in open source, follow me on OpenSauced.

A Complete Guide to Getting Started in Open Source

· 4 min read
Bekah Hawrot Weigel
Developer Experience Lead

Last week, I was tagged in this tweet.

Tweet about how to get started in open source

I appreciated the openness and honesty, and it’s a sentiment that I’ve heard from other people. It can be overwhelming to get started in open source, especially if you’re already feeling tired. And because I answer this type of question a lot, I thought it would be useful to create a whole blog post about it.

How to Get Your Pull Request Reviewed

· 4 min read
Bekah Hawrot Weigel
Developer Experience Lead

Sometimes, it can be hard to get your Pull Request (PR) reviewed, especially if there are a lot of other PRs ahead of yours. Maintainers can get busy, take some time off, or be overwhelmed with GitHub notifications. If you want to get your Pull Request reviewed, you need to make it easy for the maintainer to review your PR. How do you do that?

GitHub Actions: A Maintainer's Best Friend

· 4 min read
Nick Taylor
AI Engineer

As developers, it’s in our best interest to automate things. The less we have to do in a manual way, the better. As soon as manual intervention is required, there is potential for failure or a mishap. Aside from that, it’s your time as a maintainer that could be spent elsewhere.

If you host your code on GitHub, besides scripts to automate certain actions, you can also leverage the huge ecosystem of GitHub Actions.

Practical Examples

Let’s look at some practical examples of GitHub actions helping maintainers.

peter-evans/create-or-update-comment

If someone opens an issue on your repository, you could respond with a personal message saying thank you, but those keystrokes are probably better suited for other things. Automate a message reply instead, thanking the community member for creating the issue and mentioning you will look into it. An automated message to the issue opener is friendly, even if it’s automated.

A great GitHub action for this is Peter Evans’ Create or Update Comment action.

It’s used in the app repository for OpenSauced. Here’s how we have it configured.

When a new issue is opened, an issue responds with the following:

Automated comment when an issue is created in the OpenSauced App repository that says "Thanks for the issue, our team will look into it as soon as possible! If you would like to work on this issue, please wait for us to decide if it's ready. The issue will be ready to work on once we remove the "needs triage" label. To claim an issue that does not have the "needs triage" label, please leave a comment that says ".take". If you have any questions, please reach out to us on Discord or follow up on the issue itself. For full info on how to contribute, please check out our contributors guide."

bdougie/take-action

My coworker bdougie (@bdougieyo) created the take Github action. It allows external contributors to self-assign issues by typing .take into a comment of an issue. This removes the burden of a bit of back and forth between contributors and maintainers.

OpenSauced contributor itskish0re self assigning an issue by using the .take command

Of course, we don’t want external contributors self-assigning any issue they want. The take action also has the concept of blocking labels. For example, if an issue has a 👀 needs triage label, we can add this label to a list of blocking labels.

Someone trying to self-assign an issue when there are blocking labels on the issue

balazsorban44/nissuer

Another action that came onto my radar a couple of days ago was thanks to styfle. Although I haven’t used it yet, nissuer looks like a great utility belt GitHub action for maintainers. The Next.js repository uses it, so I'm sure it brings lots of value to a maintainer.

I love this note they added in the README.

NOTE: Developers are coming to your project with all sorts of backgrounds/skill levels or understanding of the open-source world. Show empathy while using this action. 💚 We recommend adding comments that not only dismiss unhelpful issues/comments, but educate the user on how to be more helpful in the future.

Bespoke Actions

Don’t see a GitHub action for what you need? Create your own. You can even build your own by composing it from existing GitHub actions. Here's an example of a bespoke workflow I use for pulling in my latest video content from YouTube to my blog.

I'm using some GitHub Actions, a custom script that leverages the GitHub CLI and magic.

{% raw %}
name: Get latest videos
on:
schedule:
# Everyday at midnight UTC
- cron: '0 0 * * *'
workflow_dispatch:

jobs:
update_profile_data:
name: Get latest videos
runs-on: ubuntu-latest
steps:
- uses: actions/checkout@v2
- uses: actions/setup-node@v3
with:
node-version: 18
- name: Get latest videos
run: |
npm install
node bin/udpdateStreamingPage.js
- name: Setup git config
run: |
git config user.name 'token-generator-app[bot]'
git config user.email '82042599+token-generator-app[bot]@users.noreply.github.com'
- name: PR for Videos
env:
GITHUB_TOKEN: ${{ secrets.GITHUB_TOKEN }}
run: |
./bin/pr-videos.sh
{% endraw %}

You can see the results on the streaming page of my site.

The post is a bit out of date, but I discuss more in depth the automations for my website in

https://dev.to/nickytonline/my-eleventy-meetup-talk-3b2p

Conclusion

These are just examples of tasks you can automate, and if you’re using GitHub, there is a huge ecosystem of GitHub actions to help with your automation goals.

What are some GitHub actions that you’ve leveraged in your projects? Share them in the comments.

Stay saucy peeps!

If you would like to know more about my work in open source, follow me on OpenSauced.

Open Source ABCs: YAML & YML

· One min read
Bekah Hawrot Weigel
Developer Experience Lead

Welcome to our #100DaysOfOSS series. Until October 31, we'll be doing Open Source Software (OSS) terms from A to Z. We'll be diving into a different letter of the English alphabet, uncovering OSS concepts, and sharing our thoughts on them.

Today, we're covering the letter "Y" and the difference between YAML and YML.